Installation
To install Inokufu Search in your Moodle™ platform, you need to follow these four steps:
Create your API key. In this part, we will guide you to create your credentials to authenticate with the Learning Object API.
Install Services Plugin: This plugin enables your Moodle™ platform to connect with the Learning Object API using your credentials created in the first step.
Install Repository Plugin: This plugin enables users to search and add Learning Objects to courses. Once installed, you will see Inokufu Search as a new repository in your Moodle™ platform.
Install Text editor Plugin : This plugin adds a button in the text editor to easily search and add a learning object with Inokufu Search. There are currently two plugins : one for Atto text editor and one for TinyMCE.
1. Create your API key
To install the Services plugin to your Moodle™ platform, you'll need to get an API key to connect your plugin to our Learning Object API.
Here are the steps to get an API key:
Create an account
Go to Inokufu APIs Gateway
Click on "Create an account" and fill out the form. Then validate your email to finalise your registration.
Configure the API
Return to the login page and log in.
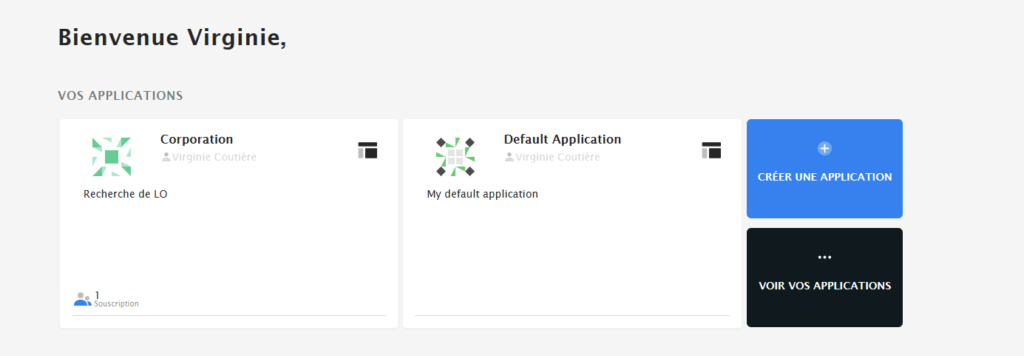
On the homepage, click on "Create an application".

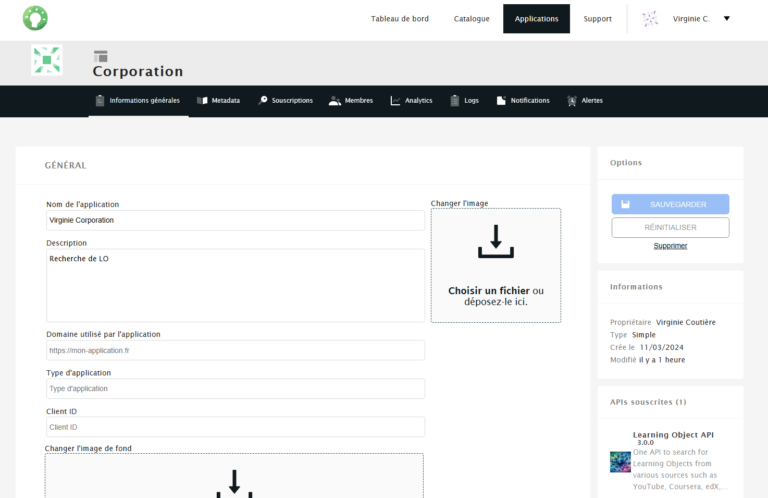
In "Application name", make sure to mention the name of your organisation. In "Description", indicate the purpose of the API for your organisation. Click on "Next".

Select "simple". In type, fill in "web" and click on "Next".

In the search bar that appears on the next screen, select "Learning Object API".

Subscribe to a plan
Once the Learning Object API is selected, our price offers are displayed. If you don't know your needs yet, we advise you to select the "Quota Plan" offer and we will get back to you to study your need.

Click on "Subscribe". You can then leave us a comment.

The procedure is now complete. You can click on "Create the application".
Subscription validation
Find the management page of your API by clicking on "Applications" in the menu bar.

In the menu of this space (black bar), click on "Subscription".
You can check the status of your subscription. If it says "Waiting", this means that we have not yet validated your subscription.

When the status shows "accepted", you can retrieve your API key. You also receive an email confirming that the subscription has been validated.
Click on the "Accepted" status to display the box containing your API key.

If needed, you can renew your API key.
You can also end your subscription, by clicking on "Revoke".
2. Install Services plugin
Installation from ZIP
Download the plugin zip file from this GitHub repository.
Log in to your Moodle site as an administrator.
Navigate to
Site administration > Plugins > Install plugins.Upload the zip file you downloaded from this GitHub repository and follow the on-screen instructions.
Complete and confirm the forms to finish the plugin installation.
Installation from sources
Establish an SSH connection to your Moodle instance.
Clone the source files from this GitHub repository directly into your Moodle source files.
Rename the cloned folder to
inokufu.Move the
inokufufolder into thelocaldirectory of your Moodle installation. Ensure that the plugin folder is namedinokufu.Open the folder in a terminal.
Install the Composer dependencies (you will need to install Composer if you don't have it yet).
composer installLog in to your Moodle site as an administrator.
Navigate to
Site administration > Notificationsto finalize the plugin installation.
Configuration
After a successful installation, you should be prompted to fulfill the original configuration for the plugin (including you API key). You can still access this menu from
Site administration > Plugins > Local plugins > Inokufu Services.Save changes, and start using our plugin.
Note: An API Key is required in order to use this plugin. To obtain an API Key, please refer to the 1st step above or contact Inokufu Support.
3. Install Repository plugin
Installation from ZIP file
Download the zip file of the plugin from this link.
Log in to your Moodle™ platform as an administrator.
Go to Site Administration > Plugins > Install plugins.
Upload the zip file that you downloaded and follow the on-screen instructions.
Fill out and confirm the forms to complete the plugin installation.
Installation from Github
Establish a SSH connection to your Moodle™ platform.
Clone the source files from this GitHub repository directly into your Moodle™ platform source files.
Rename the cloned folder to inokufu.
Move the inokufu folder into the repository folder of your Moodle™ installation. Make sure the plugin folder is named inokufu.
Log in to your Moodle™ platform as an administrator.
Go to Site Administration > Notifications to finalise the plugin installation.
Configuration
After successful installation, navigate to
Site administration > Plugins > Repositories > Manage repositoriesto configure the plugin settings.Activate the
Inokufu Searchrepository plugin by switching it toEnabled and visible.Navigate to the plugin settings, by clicking on
Settings(next toInokufu SearchandEnabled and visible), or by navigating toSite administration > Plugins > Repositories > Inokufu Search.Enter the Plugin Name (Optional).
Save changes, and start using the repository plugin.
4. Install Text editor plugin
In order to integrate Inokufu Search into the editor of your Moodle™ platform, you need to install a second plugin.
If you are using the TinyMCE editor, please download the Inokufu Search Moodle TinyMCE plugin.
Otherwise, we recommend installing the Inokufu Search - Atto plugin.
To find out if the TinyMCE editor is enabled on your Moodle™ platform, go to Site administration > Plugins > Text editor > Editor management.


Installation from ZIP
Download the text editor plugin zip file:
Log in to your Moodle™ platform as an administrator.
Navigate to
Site administration > Plugins > Install plugins.Upload the zip file you downloaded and follow the on-screen instructions.
Complete and confirm the forms to finish the plugin installation.

Installation from Github
Establish a SSH connection to your Moodle™ platform.
Depending the text editor you want to install:
For TinyMCE:
Clone the source files from this GitHub repository directly into your Moodle™ platform source files.
Move the
inokufufolder into thelib/editor/tiny/pluginsdirectory of your Moodle installation.
For Atto:
Clone the source files from this GitHub repository directly into your Moodle™ platform source files.
Move the
inokufufolder into thelib/editor/atto/pluginsdirectory of your Moodle installation.
Ensure that the plugin folder is named
inokufu.Log in to your Moodle site as an administrator.
Navigate to
Site administration > Notificationsto finalize the plugin installation.
Configuration
After successful installation, navigate to
Site administration > Plugins > Text Editors > Atto Toolbar Settingsto configure the plugin settings.
In the
Toolbar Configurationtext field, add a new row :search = inokufu, above the rawfiles = (...).Save changes, and start using our atto plugin.

Inokufu Search is now installed and usable by your users. 🥳